L1224R +06 rear lights

Discussion in 'Electrical' started by Shawn, May 10, 2013.

  1. OP
    Shawn

    Shawn Cranky old man

    Here's the set I got. They currently list 1 set left and the price is bizarre at the moment. Maybe they want to keep the auction going until they restock. I bet it has something to do with fleabay fees.

    http://www.ebay.com/itm/151032796649?ssPageName=STRK:MESINDXX:IT&_trksid=p3984.m1424.l2649


    Here's a $15.00 China seller.

    http://www.ebay.com/itm/1156-BA15S-CREE-R5-12-SMD-5050-LED-Car-Reverse-Turn-Brake-Tail-Light-Bulb-Lamp-/271191194096?pt=Motors_Car_Truck_Parts_Accessories&hash=item3f244139f0&vxp=mtr

    Here's a USA set for $30.00

    http://www.ebay.com/itm/2Pcs-Super-Bright-Xenon-White-T25-3156-3157-CREE-R5-12-SMD-5050-LED-Light-Bulbs-/121097052361?pt=Motors_Car_Truck_Parts_Accessories&hash=item1c31f260c9&vxp=mtr

    I just found these interesting units. Notice the metal tabs at the base. These replace the Ford socket and bulb.

    [​IMG]

     
  2. Ranger Forum Sign Up!

    Join RangerForum.com Today - It's Totally Free!

    Are you a Ford Ranger fan? If so we invite you to join our community and see what it has to offer. Our site is specifically designed for you and it's a great place for Ford Ranger Fans to meet online.
    Once you join you'll be able to post messages, upload pictures of your Ford, and have a great time with other Ranger fans. Whether your an old timer or just bought your Ford you'll find that Ranger Forum is a great community to join. Best of all it's totally free!

    Join RnagerForum.com Today! JOIN FOR FREE

  3. OP
    Shawn

    Shawn Cranky old man

    Have you considered those switchback 2 color bulbs? If you got a set of red and clear, you could install them inside the Ford housing and have it all look stock.
    I have a LED third brake light with cargo lights. I removed the clear and red lens and installed a solid red lens. I then wired the cargo lights to the brake lights. I have considered rewiring the red cargo lamps to the turn signals. I believe it would be even safer to have the signals high. Ex school bus driver here. Also no extra lights would be showing on the truck.
     
    Last edited: May 16, 2013
  4. fomoco

    fomoco Moderator

    those pic that you posted looks like a 9145 replacement, I will have to look into that on payday, and probally buy it from a US seller, I don't really trust a china sellers
     
  5. OP
    Shawn

    Shawn Cranky old man

    I have had good luck with China sellers. US sellers give me more trouble on the small items.
     
  6. fomoco

    fomoco Moderator

    my prob with china sellers is.... usually takes forever to get anything
     
  7. OP
    Shawn

    Shawn Cranky old man

    Well I am making progress with the L1224R's. I cut the extra sockets and epoxied the outer part to the L1224R's.
    I wanted to use the leftovers from those sockets and solder the LED's pigtail to it, so I would have a plug n play adapter harness.
    They soldered up fine, so I figured I would mix up some epoxy to fill the cavity with the solder joints.
    Well I can officially say, DON'T DO THIS. There is a hole between the bulb socket contacts and the terminals. The hole is large enough for epoxy to flow through.:eek:
    The 2 new sockets are on their way...I will solder and shrink wrap this time......
    As with the EATC..slow but steady..
    Neither of these mods is super difficult, but they do require you to take your time. Cutting and Dremeling the light sockets properly takes more time than you think.
     
    Last edited: May 20, 2013
  8. OP
    Shawn

    Shawn Cranky old man

    Some photos..LED backups and 06 tails.

    [​IMG]
    [​IMG]
    [​IMG]
     
  9. Scrambler82

    Scrambler82 Old Guy User

    What bulb is this, interesting and bright !
     
  10. OP
    Shawn

    Shawn Cranky old man

  11. OP
    Shawn

    Shawn Cranky old man

    The bulbs I bought did not light at first. I flipped them and they still did not work.
    I had to flip the connection wires to the opposite side to make contact with the Ford socket.

    [​IMG]
     
  12. Scrambler82

    Scrambler82 Old Guy User

    Thanks for the address.

    Will the tape keep too much heat inside the lamp assembly ?

    The original rib design is usually to dissipate the heat.

    Looks good, like the light output.
     
  13. OP
    Shawn

    Shawn Cranky old man

    I doubt that it's a problem for reverse lights. They are not on that long.
     
  14. Fx4wannabe01

    Fx4wannabe01 New Member

    I was the first in the Ranger world to toss these into a '06 factory tail back in mid 2008 or so. Got mine from a gentleman in Illinois who put 2 in each aftermarket tail he was running and luckily mine came with the factory pigtails with them. The 3-wire pigtail is very simple....ground, brake/turn, and running. I soldered them into the factory harness, heat shrink, and they look factory and proper.

    Originally I had JB welded remnants of the Lincoln tail lamp to mine so I had something to screw the L1224R into. This lasted about 2 or 3 years til one bulb was hanging by the wires under the truck while I was out of town. Quickly taped her back into place until I figured out a better option. The problem with how I did it originally was the LED was deep into the housing, not utilizing the factory reflector the way the LED was designed.

    [​IMG]
    [​IMG]
    [​IMG]
    [​IMG]
    [​IMG]
    [​IMG]

    Even though my original setup wasn't using the LED's to their fullest potential, it flat out KNOCKED the socks off plug-in LED's and completely BLEW THE LEGS OFF an incandescent 3157.

    The problem with plug-in LED's is the difference between "low" and "high" is minimal.

    (this should be a video link)
    [​IMG]

    [​IMG]
    [​IMG]
     
  15. Fx4wannabe01

    Fx4wannabe01 New Member

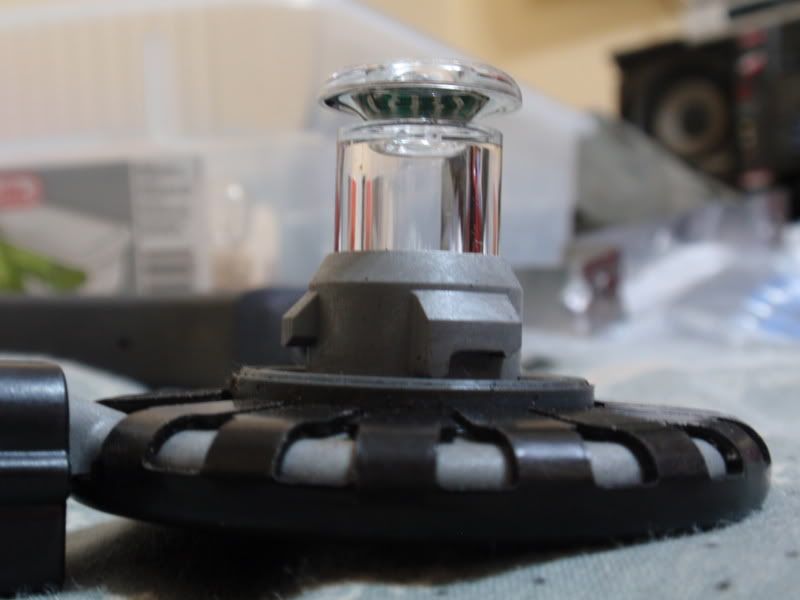
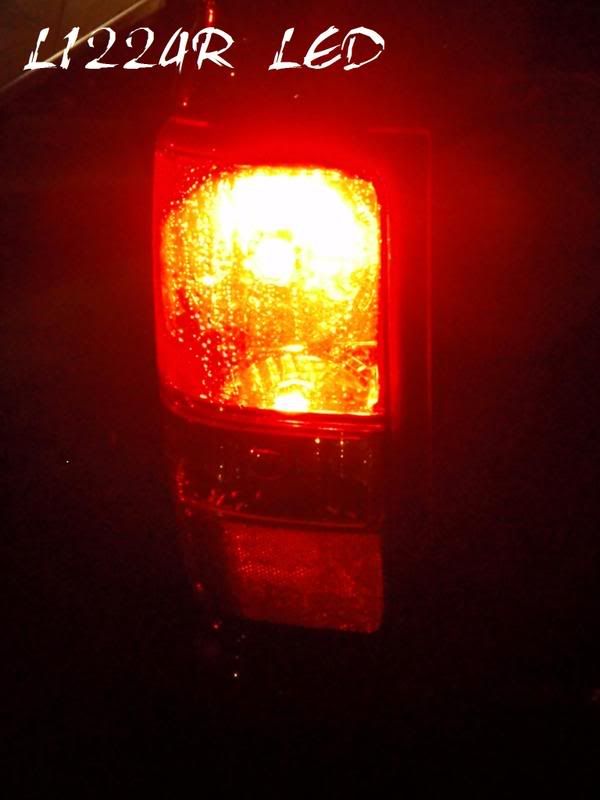
    Later, I retrofitted a set of factory bulb holders onto the L1224R's by cutting off the LED's "twist knobs", cutting apart the bulb holder so it would fit perfectly onto the LED with a little gap below for the rubber sealing ring. Scuffed the outer surface of the LED and the inner of the new parts and used JB weld. This put the LED more into the housing, thus utilizing the reflector better.....made the light output better and it better filled the round reflector to bounce light off the entire reflector.

    [​IMG]

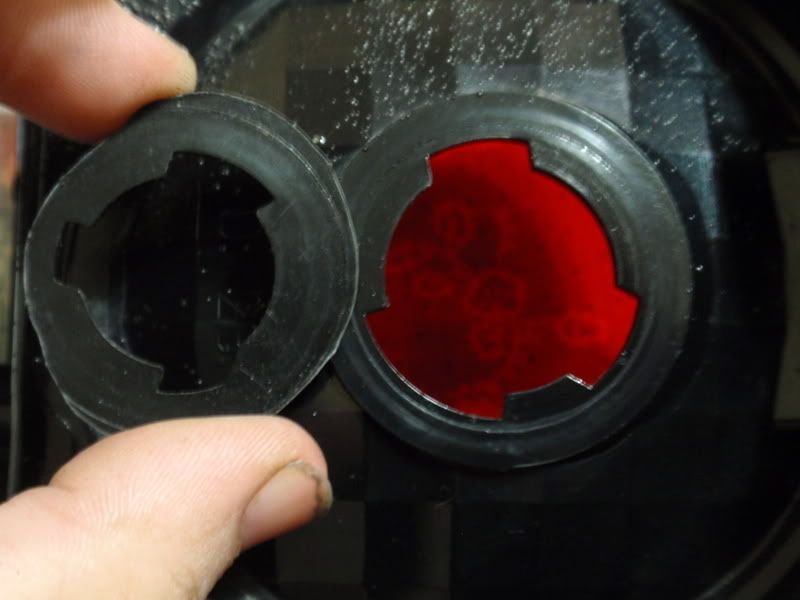
    There are different types of those bulb holders that will screw into the Ranger Tail/Brake/Turn holder. Some that are more streamlined while others are more bulky....and if memory serves me correctly, one is more desirable than the other for this particular job.

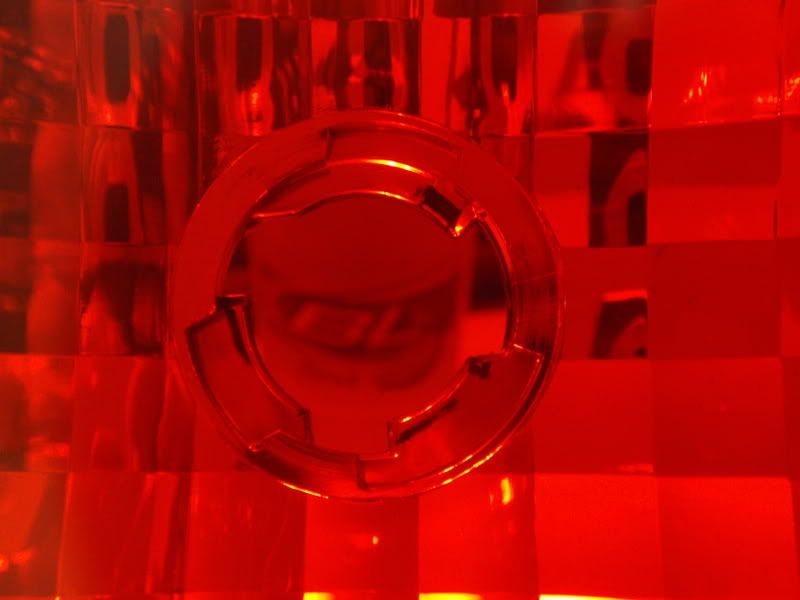
    You seem very detail oriented judging by how your truck is progressing, something to keep in mind is the orientation of the LED pigtail. In certain areas, it will hit your bed sheet metal or the lamp won't even install. Test fitting is the best thing to do before putting the "permanent" epoxy or JB weld onto the parts. When I retrofitted, you've got two variables now so keep that in mind.

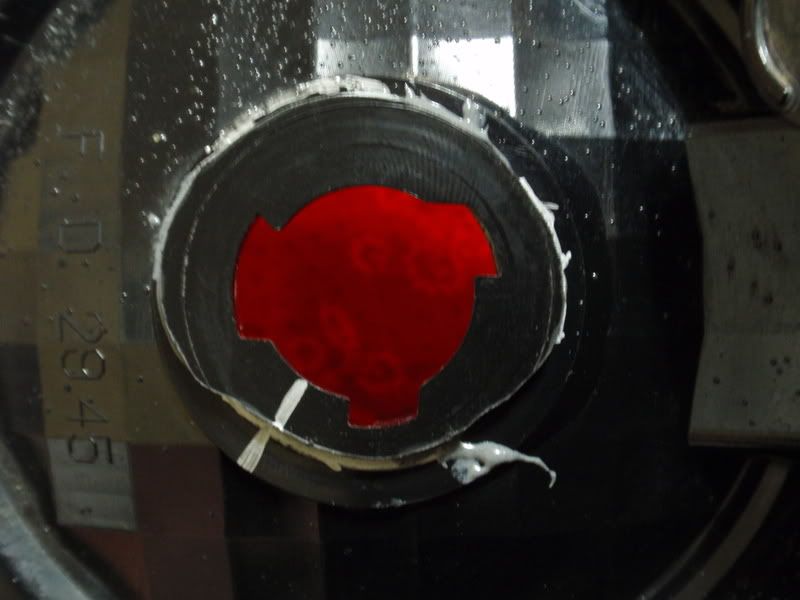
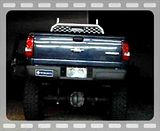
    Pictured below is how mine are oriented to the lamp....great clearance from the body panels and screws.
    [​IMG]


    Unfortunately back when I retrofitted sometime in 2011, I never took pics of the process. I will be back with my truck on Monday night and will update this thread with pictures if you'd like. As well as pictures of the different bulb holders.


    You will need to get an LED rated EP27 flasher to eliminate "hyperflash"....when the blinkers blink like crazy because they think a bulb is out.


    They've worked absolutely flawlessly for the last 5+ years and expect them to last 5+ more! Thanks for the link!!! I'm thinking about splurging on another set to let my Electrical Engineer little brother tinker with them for use up front...in AMBER.
     
    Last edited: May 26, 2013
  16. OP
    Shawn

    Shawn Cranky old man

    L1224r's are in...They are about twice as bright as the standard filament bulb. Nice even light. I am pleased with them.
    The last photo is with the L1224R on the passenger side and filament bulb on the drivers side. Photo is with 4 way hazards on.


    [​IMG]
    [​IMG]
    [​IMG]
    [​IMG]
     
  17. buggman

    buggman Do not touch the trim!

    Lookin good!
    I've been looking into some of those cree style led's for my new reverse led's... I wonder how hot they get?? Looks like they're only about 1/4" away from the clear reverse lens.
     
  18. OP
    Shawn

    Shawn Cranky old man

    Yes, they are close to the rear lens. The clear dome is just a lens itself. I don't think I would want to use these for parking lights. As reverse lights they will be fine. I do need something for the front parking lights. I may have to hook a set of these to a battery and see how hot they get. let them on for a half hour or more.
     
  19. Fx4wannabe01

    Fx4wannabe01 New Member

    Neat idea, but NOT a fan. More power to 'ya. Like I said, I soldered and shrink tubed mine....looks factory and isn't a mosh/posh of parts wired together.
     
  20. OP
    Shawn

    Shawn Cranky old man

    These are heat shrunk and soldered also. I had difficulty heat shrinking the light socket. I went this route for several reasons. I could have cut the original harness and soldered in the L1224R sockets but I want to be able to move these to my next Ranger. Also if one of these happens to blow out for some reason, I can drop a stock bulb back in, in seconds. Third, I needed to see how well the L1224R's worked in the Ranger housings for myself before I committed to them.
    I have no regrets about my ugly hodgepodge adapter harness. It is properly soldered and sealed and serves my needs exactly. It wont come apart or corrode from water ingress. And no one sees it now that it's installed.
     
  21. Fx4wannabe01

    Fx4wannabe01 New Member

    I see the reasoning behind it. It serves a purpose. Good on 'ya!
     

Share This Page