Redneck_ranger
Banned
This How To is for the 01+ Rangers that have the 4.0 SOHC engine. **NOT TO BE CONFUSED WITH THE OHV USED IN THE 00-**
For this procedure, you will need:
12mm socket or open ended wrench
Some sort of container such as a 2 gallon bucket
Funnel
Oil filter wrench
Flat head screwdriver (Not required)
Hammer (Not required)
5 quarts 5W-30 oil
New oil filter
Rags
First, take your bucket and place it underneath your oil pan, and position it to accomodate the oil pouring out of the drain. Remember, it comes out towards the side of the truck. Not straight down.
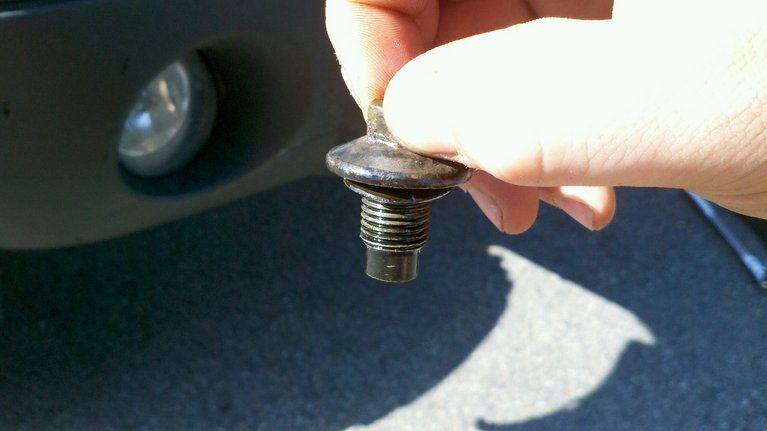
Next, take your 12mm socket/wrench, and loosen your bolt. Then you can use your fingers to loosen it all the way to prevent the bolt from falling into the container. A little oil on your fingers saves you from having a hand covered in it when reaching in to find it.
Looking from the front passenger side of the truck:
Next, let your oil drain out until single drops about a second apart are seen. After that, put your drain bolt back in and tighten it until it's snug. **DO NOT OVERTIGHTEN** You may strip out the pan if you do, which is a BAD THING!
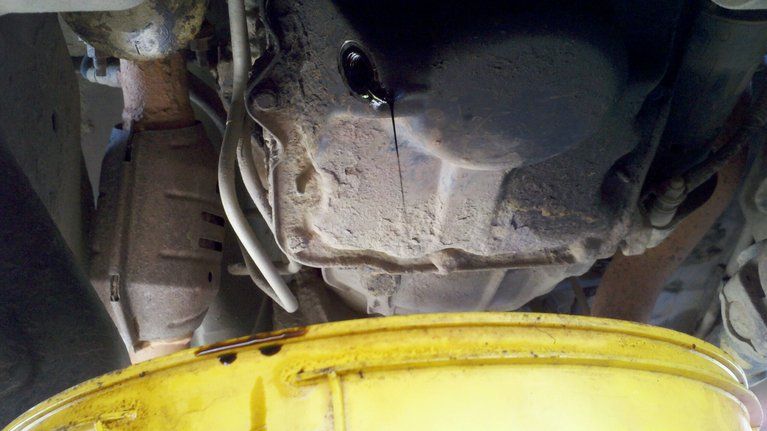
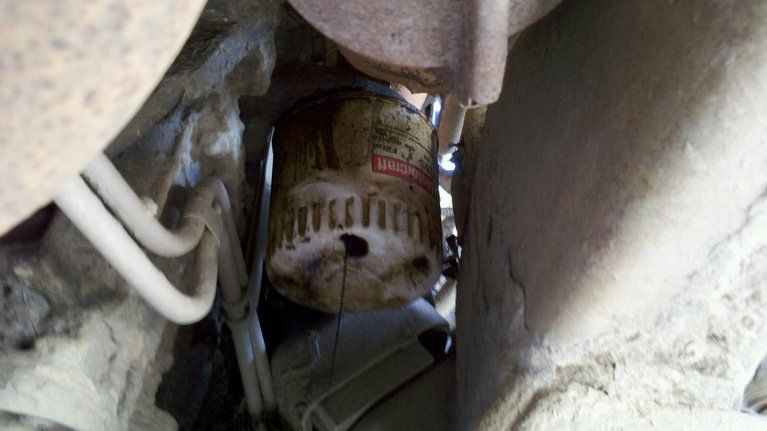
Next, locate your oil filter. It is in between the oil pan and the passenger side frame. Here's where the real fun begins! The engineers of Ford decided to leave you a quarter inch gap on each side, making your working room basically nonexistent. I suggest, but its not necessary, getting a filter with a nut on the end so you can put a socket/rachet on it such as a K&N filter. Yes, slightly more expensive. But so much less trouble! Anyways, (This part is not required, this is just how I do it) I punch a hole in the base of the filter to drain the oil out of it so it doesn't spill all over when I take out the filter. Use your screwdriver and hammer to punch a hole somewhere in the bottom of the filter and let it drain into your container.
FYI! It will drain onto your control arm mount, so keep some rags ready for when you're done.
After that's done draining, (Again, this is not necessary, it's just how I do it) use the screwdriver/hammer to punch a hole in the side of the filter so you can turn it and loosen it. To loosen it, turn the filter clockwise.
After that's all done, open your container of new oil, stick your finger in (make sure it's clean) and rub it on the rubber gasket of the new filter. Put the new filter on and once the gasket touches the housing for the filter, turn it one full turn, or until tight. But no more than one full turn AT MOST! After the new filter is on, take your cap off of your oil fill opening under the hood, and put in the new oil. I recommend using a funnel so you don't spill it on the engine. It has a tendency to catch on fire if the engine is hot, or smoke badly once it gets heated... Not fun. Put your filler cap back on, and congratulations! You have successfully changed your oil!
A little side note, make sure to check your oil weekly on FLAT GROUND!!!!!! Or else this happens, and it is extremely bad for your engine.
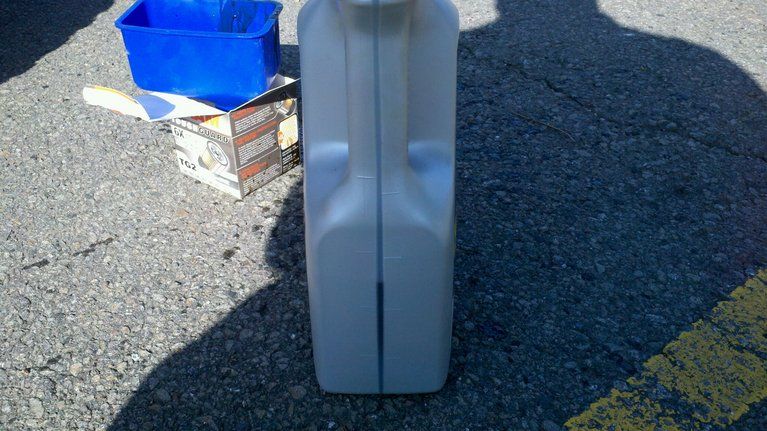
5 quarts went in, 2.5 quarts came out. Good luck to you!
For this procedure, you will need:
12mm socket or open ended wrench
Some sort of container such as a 2 gallon bucket
Funnel
Oil filter wrench
Flat head screwdriver (Not required)
Hammer (Not required)
5 quarts 5W-30 oil
New oil filter
Rags
First, take your bucket and place it underneath your oil pan, and position it to accomodate the oil pouring out of the drain. Remember, it comes out towards the side of the truck. Not straight down.
Next, take your 12mm socket/wrench, and loosen your bolt. Then you can use your fingers to loosen it all the way to prevent the bolt from falling into the container. A little oil on your fingers saves you from having a hand covered in it when reaching in to find it.
Looking from the front passenger side of the truck:
Next, let your oil drain out until single drops about a second apart are seen. After that, put your drain bolt back in and tighten it until it's snug. **DO NOT OVERTIGHTEN** You may strip out the pan if you do, which is a BAD THING!
Next, locate your oil filter. It is in between the oil pan and the passenger side frame. Here's where the real fun begins! The engineers of Ford decided to leave you a quarter inch gap on each side, making your working room basically nonexistent. I suggest, but its not necessary, getting a filter with a nut on the end so you can put a socket/rachet on it such as a K&N filter. Yes, slightly more expensive. But so much less trouble! Anyways, (This part is not required, this is just how I do it) I punch a hole in the base of the filter to drain the oil out of it so it doesn't spill all over when I take out the filter. Use your screwdriver and hammer to punch a hole somewhere in the bottom of the filter and let it drain into your container.
FYI! It will drain onto your control arm mount, so keep some rags ready for when you're done.
After that's done draining, (Again, this is not necessary, it's just how I do it) use the screwdriver/hammer to punch a hole in the side of the filter so you can turn it and loosen it. To loosen it, turn the filter clockwise.
After that's all done, open your container of new oil, stick your finger in (make sure it's clean) and rub it on the rubber gasket of the new filter. Put the new filter on and once the gasket touches the housing for the filter, turn it one full turn, or until tight. But no more than one full turn AT MOST! After the new filter is on, take your cap off of your oil fill opening under the hood, and put in the new oil. I recommend using a funnel so you don't spill it on the engine. It has a tendency to catch on fire if the engine is hot, or smoke badly once it gets heated... Not fun. Put your filler cap back on, and congratulations! You have successfully changed your oil!
A little side note, make sure to check your oil weekly on FLAT GROUND!!!!!! Or else this happens, and it is extremely bad for your engine.
5 quarts went in, 2.5 quarts came out. Good luck to you!
Last edited by a moderator: