01B3000
ORIGINAL Portable Seizure
Perform at own risk
Ok, when I first put on my FX2 decals wrong, way wrong. They came out looking like poo and I had to order two new ones..
My father sometimes does the decaling on the trucks for the company he works for, and he showed me the right way to do it.
You need:
Cool, shaded area to work
The vinyl decals (of course)
Windex
Goo-Gone (Or similar product)
Squeegee
Spray Bottle
Dish Soap
Water
About 30 min
Possibly a friend
Sharp Razor
Now before you do anything make sure that your truck is in a cool, shaded area, not in direct sunlight, a garage really would be perfect for this
Step 1: Cut any pinstripes that could go under the decal, this will hinder the ability of it to be flat against the body, then clean the body panel you are going to install the decal on. Get any sticky residue off with Goo-Gone or similar product, and then wipe down the side of the truck with windex.
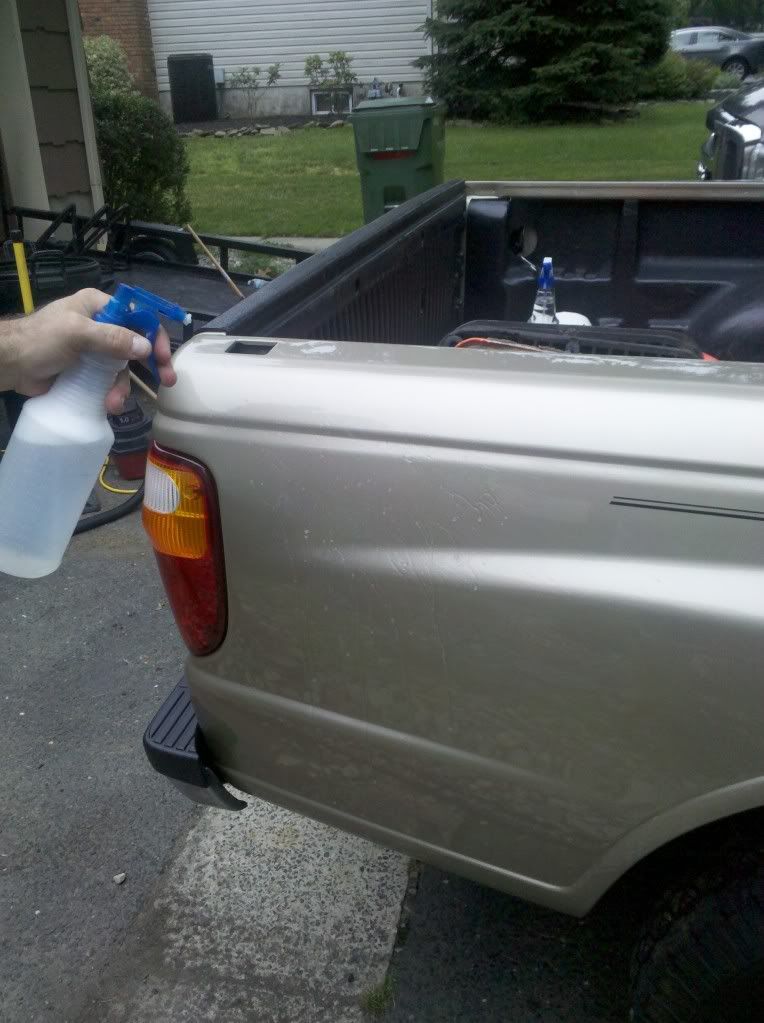
Step 2: Take the spray bottle, put 2 or 3 drops of dish soap in and then mix with water and shake.
Step 3: With the truck still clean, Spray the soapy water on the truck. Keep the bottle close by after this
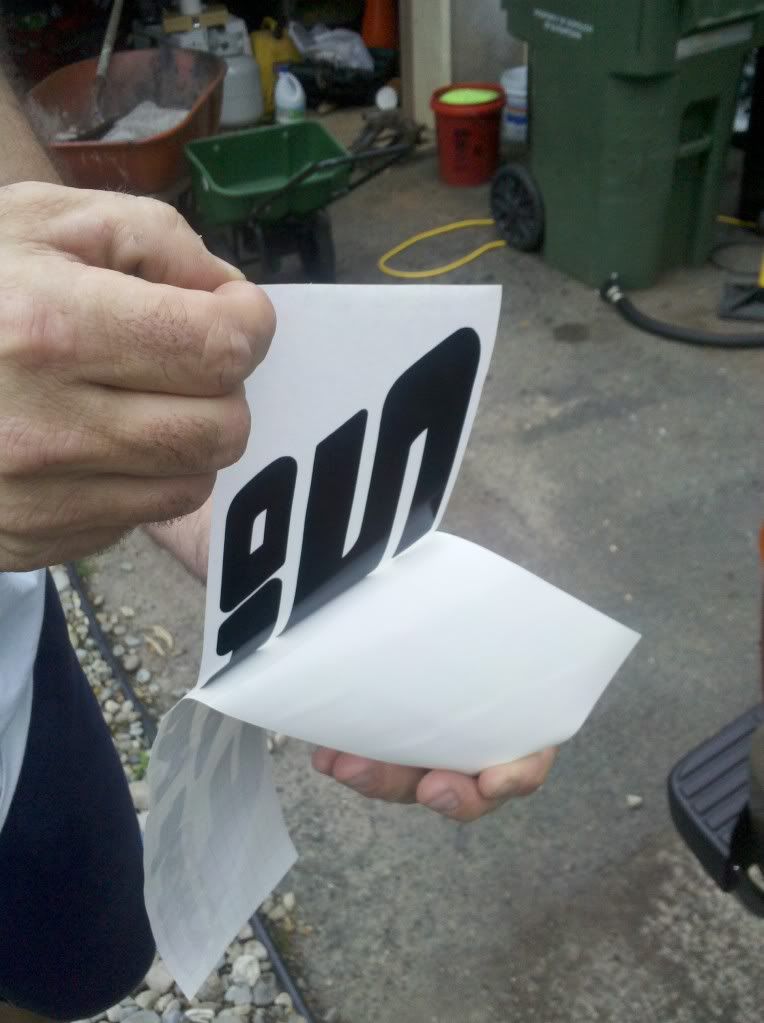
Step 4: Peel the paper backing off of the decal, ALWAYS PEEL AT AN ANGLE, and put it somewhere safe where nothing will stick to it, or have a friend hold it.
Step 5: Again, take your spray bottle and spray the area again with the soap and watter mix.
Step 6: Carefully position the decal on the truck, the soapy water will make it possible to remove the decal so you can align it properly.
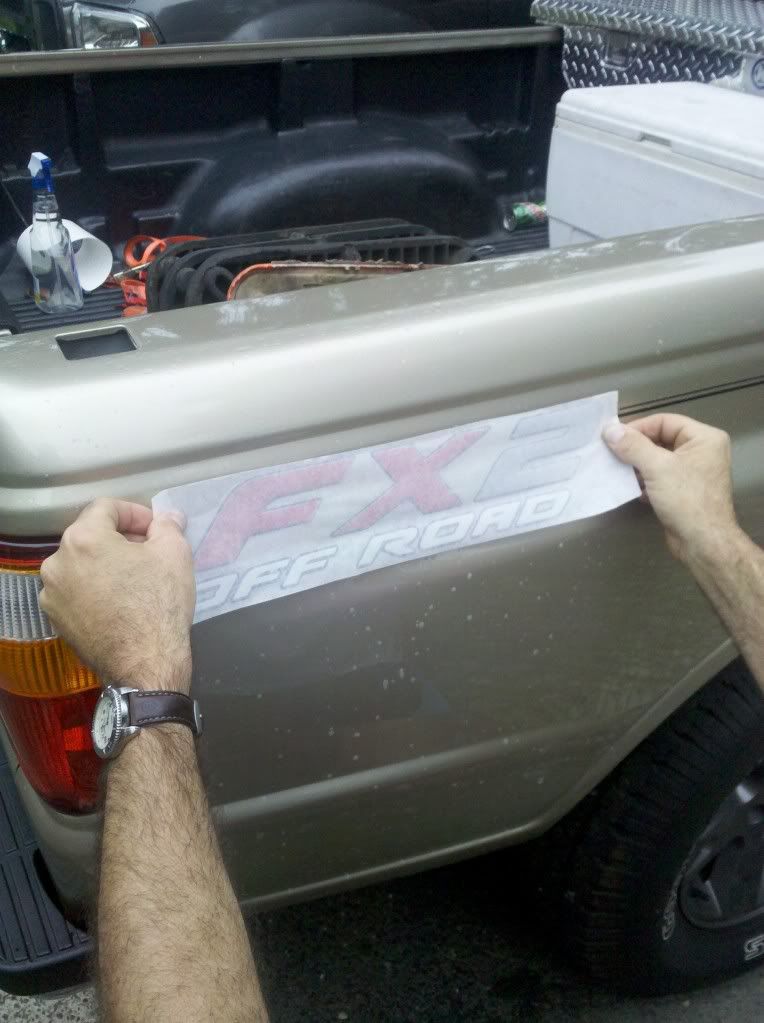
Step 7: Once properly aligned, hold one end of the decal off the truck slightly and with your other hand take your thumb and gently push out the air bubbles working from left to right.
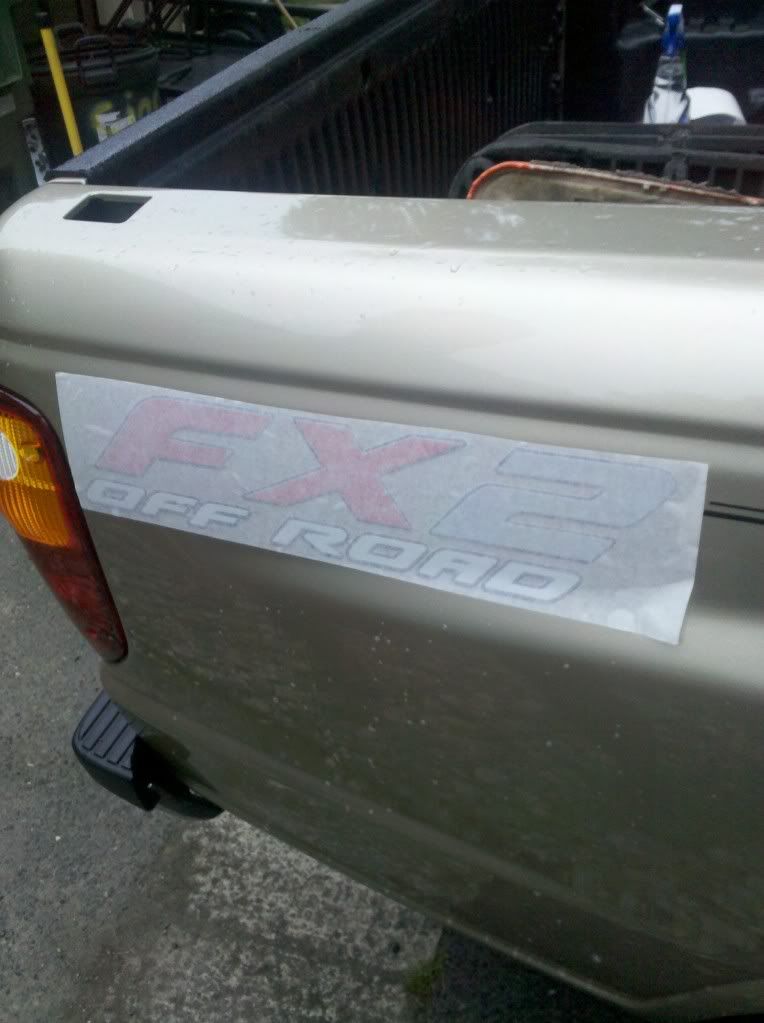
Step 8: Get the squeegee and from the center of the decal* push lightly, as to get as much of the soapy water out from under the decal, In this order
From the Center:
Up
Down
Left
Right
Diagonal
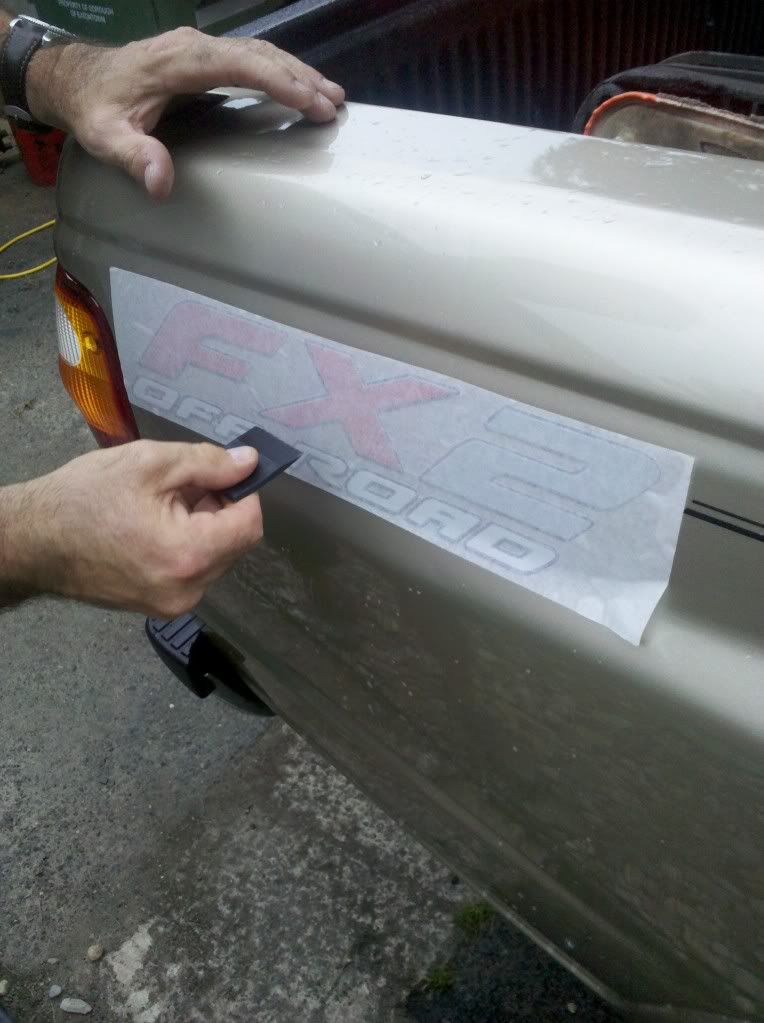
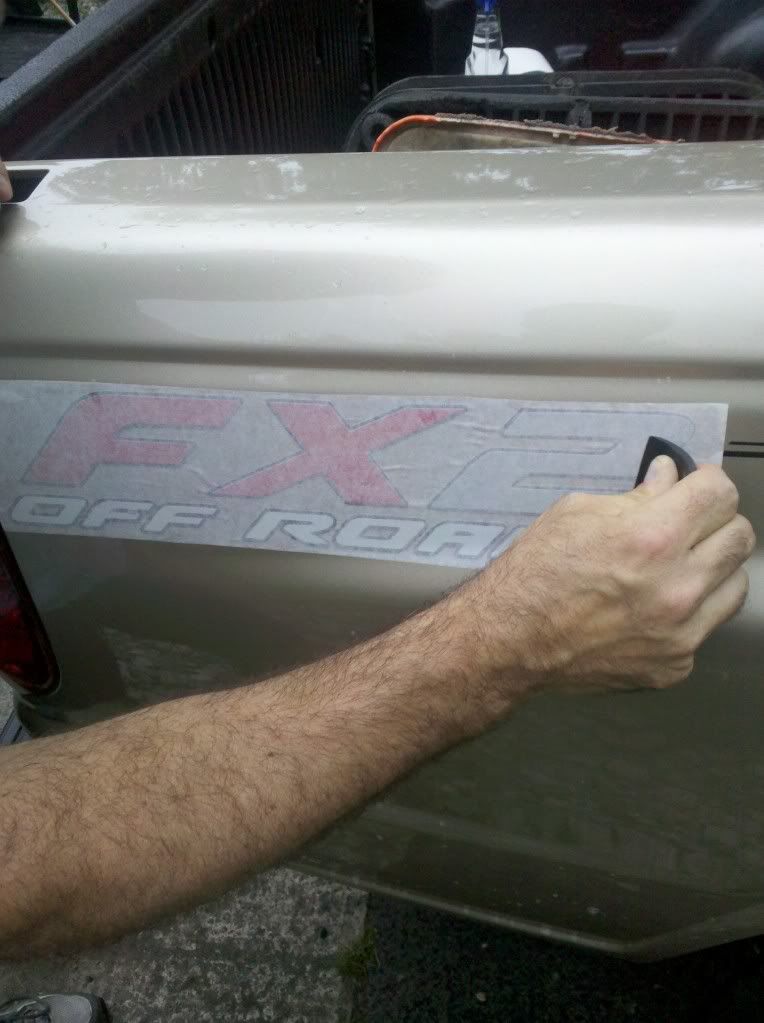
*For FX4 And FX2 Decals go from the center of each letter one at a time
Step 9: Once the squeegeeing is complete, SLOWLY REMOVE THE TRANSFER PAPER, do so by pulling at an angle, almost flat against the truck.
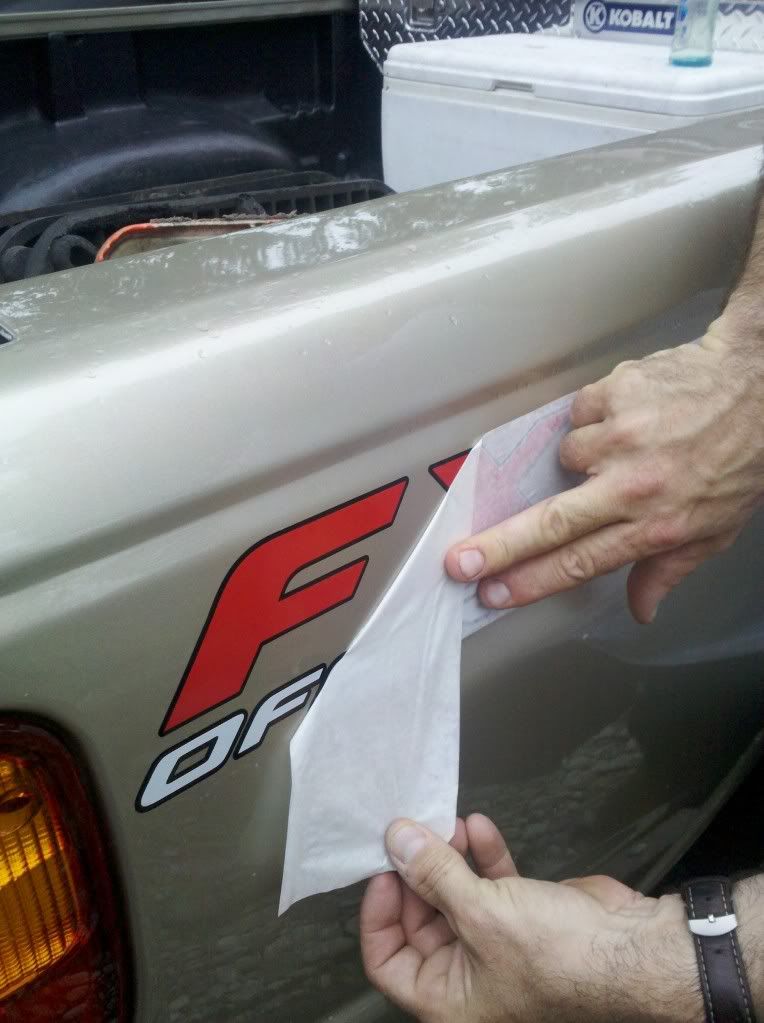
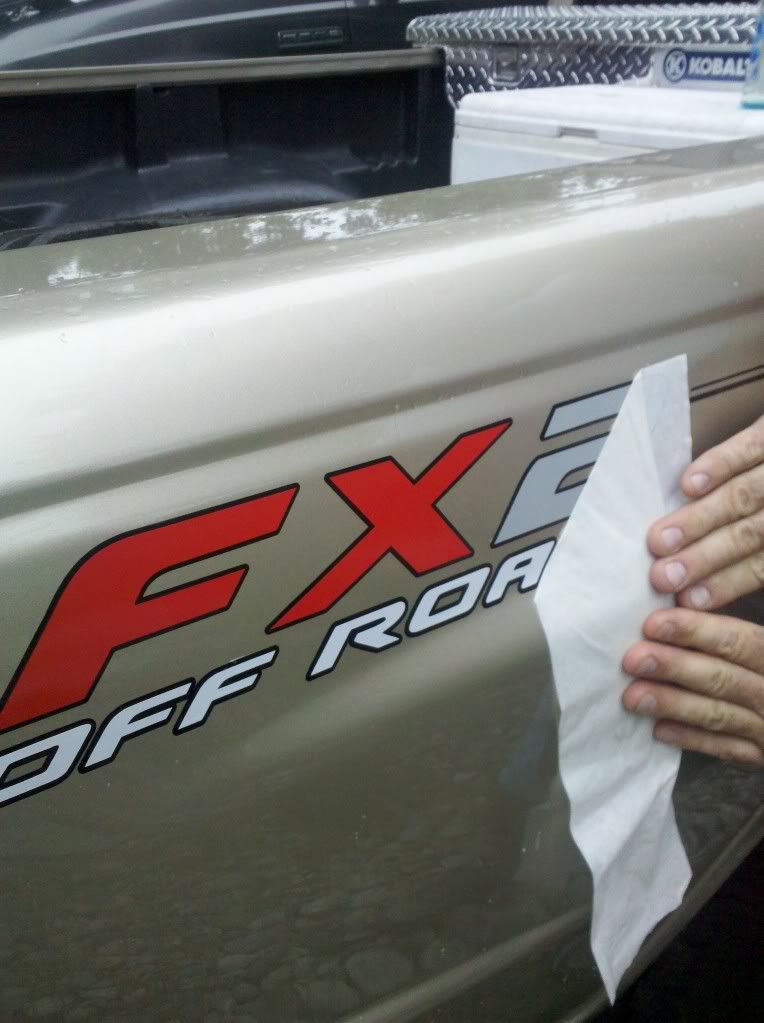
Step 10: About a minute after the transfer paper has been removed, Lightly go over the decal in the same order as step 8 in order to make sure the edges of the decal are sticking to the truck and to get any more air and water out from under the decal.
Repeat for the other side.
IF YOU HAVE AIR BUBBLES:
Take an extremely sharp knife and make a tiny slit in the center of the bubble, and with the squeegee gently squeeze out the air, Do not go to hard on this otherwise it will drag part of the sticker stretching it.
After about half an hour, go and repeat step 10. Then repeat again after about 1 hour. In that time period, DO NOT DRIVE THE TRUCK, you need to give time for the water that is under the decal to dry so that the adhesive can stick to the paint.
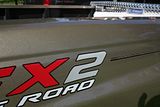
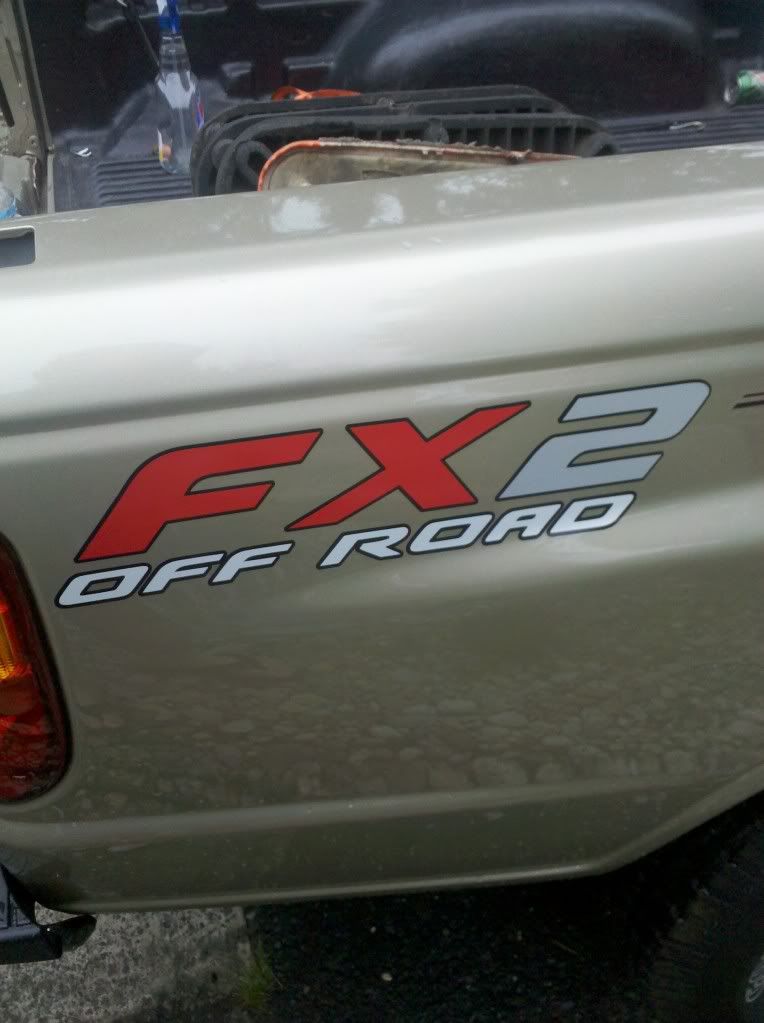
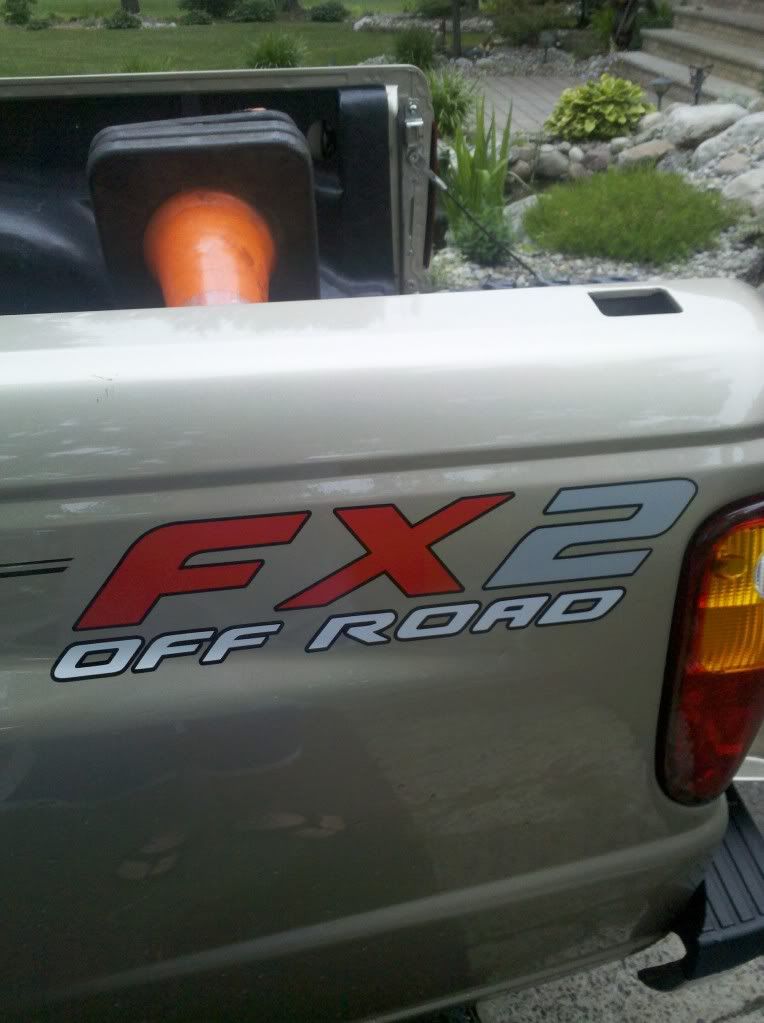
FINAL RESULTS:
Ok, when I first put on my FX2 decals wrong, way wrong. They came out looking like poo and I had to order two new ones..

My father sometimes does the decaling on the trucks for the company he works for, and he showed me the right way to do it.
You need:
Cool, shaded area to work
The vinyl decals (of course)
Windex
Goo-Gone (Or similar product)
Squeegee
Spray Bottle
Dish Soap
Water
About 30 min
Possibly a friend
Sharp Razor
Now before you do anything make sure that your truck is in a cool, shaded area, not in direct sunlight, a garage really would be perfect for this
Step 1: Cut any pinstripes that could go under the decal, this will hinder the ability of it to be flat against the body, then clean the body panel you are going to install the decal on. Get any sticky residue off with Goo-Gone or similar product, and then wipe down the side of the truck with windex.
Step 2: Take the spray bottle, put 2 or 3 drops of dish soap in and then mix with water and shake.
Step 3: With the truck still clean, Spray the soapy water on the truck. Keep the bottle close by after this
Step 4: Peel the paper backing off of the decal, ALWAYS PEEL AT AN ANGLE, and put it somewhere safe where nothing will stick to it, or have a friend hold it.
Step 5: Again, take your spray bottle and spray the area again with the soap and watter mix.
Step 6: Carefully position the decal on the truck, the soapy water will make it possible to remove the decal so you can align it properly.
Step 7: Once properly aligned, hold one end of the decal off the truck slightly and with your other hand take your thumb and gently push out the air bubbles working from left to right.
Step 8: Get the squeegee and from the center of the decal* push lightly, as to get as much of the soapy water out from under the decal, In this order
From the Center:
Up
Down
Left
Right
Diagonal
*For FX4 And FX2 Decals go from the center of each letter one at a time
Step 9: Once the squeegeeing is complete, SLOWLY REMOVE THE TRANSFER PAPER, do so by pulling at an angle, almost flat against the truck.
Step 10: About a minute after the transfer paper has been removed, Lightly go over the decal in the same order as step 8 in order to make sure the edges of the decal are sticking to the truck and to get any more air and water out from under the decal.
Repeat for the other side.
IF YOU HAVE AIR BUBBLES:
Take an extremely sharp knife and make a tiny slit in the center of the bubble, and with the squeegee gently squeeze out the air, Do not go to hard on this otherwise it will drag part of the sticker stretching it.
After about half an hour, go and repeat step 10. Then repeat again after about 1 hour. In that time period, DO NOT DRIVE THE TRUCK, you need to give time for the water that is under the decal to dry so that the adhesive can stick to the paint.
FINAL RESULTS:
Last edited by a moderator: