New buggman mod in the works

Discussion in 'Electrical' started by buggman, May 4, 2012.

  1. buggman

    buggman Do not touch the trim!

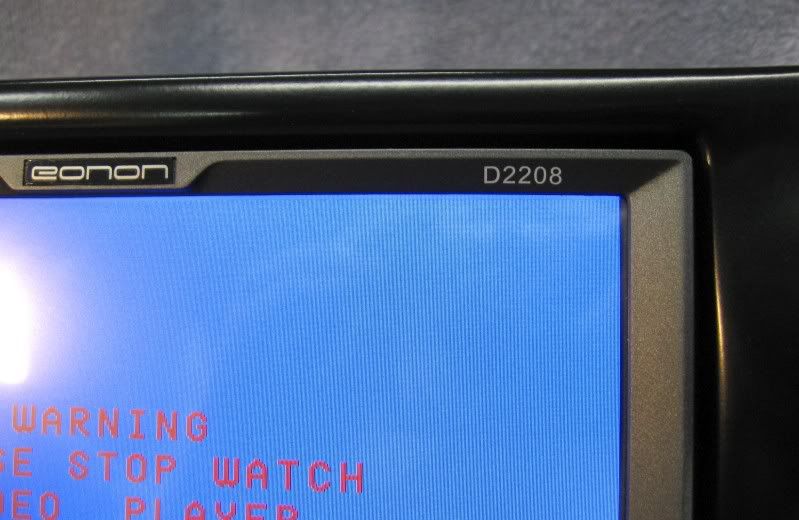
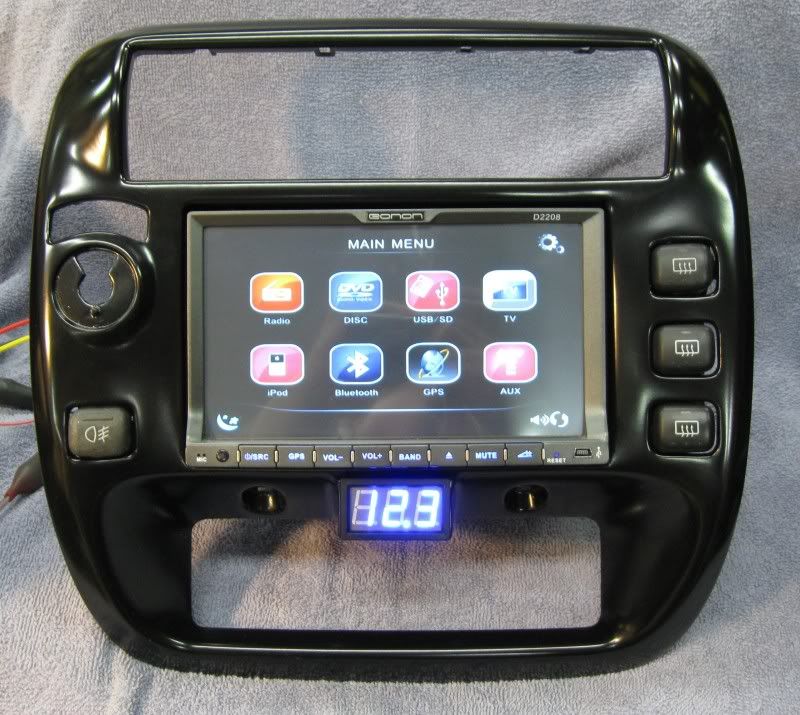
    Since I got Hooligan's "old" double din dvd head unit, I've been contemplating just how I want to install it.
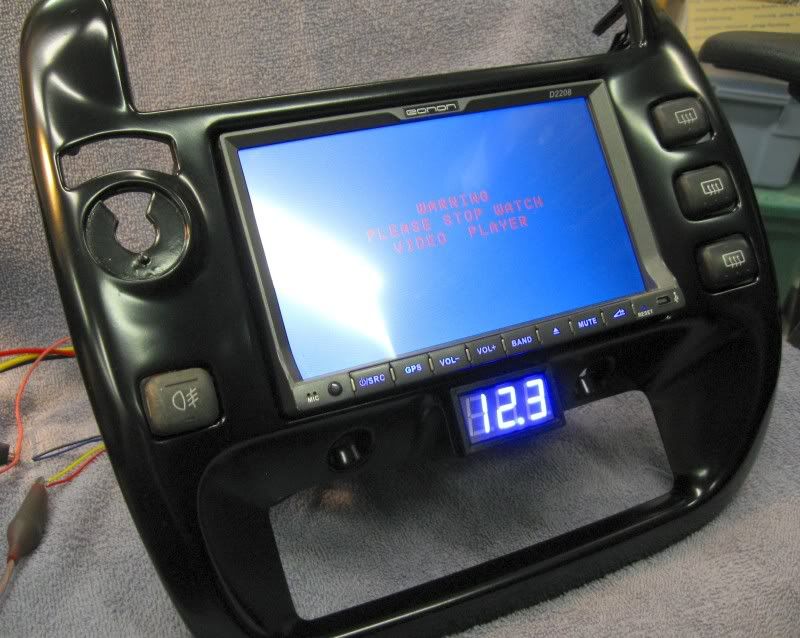
    My current radio bezel has my 3x OEM fog switch mod, so that's definitely something I'll carry over to the new bezel.
    After getting a scoche dash kit & seeing that it won't work the way I wanted to, I started designing my own install kit/bezel mod.

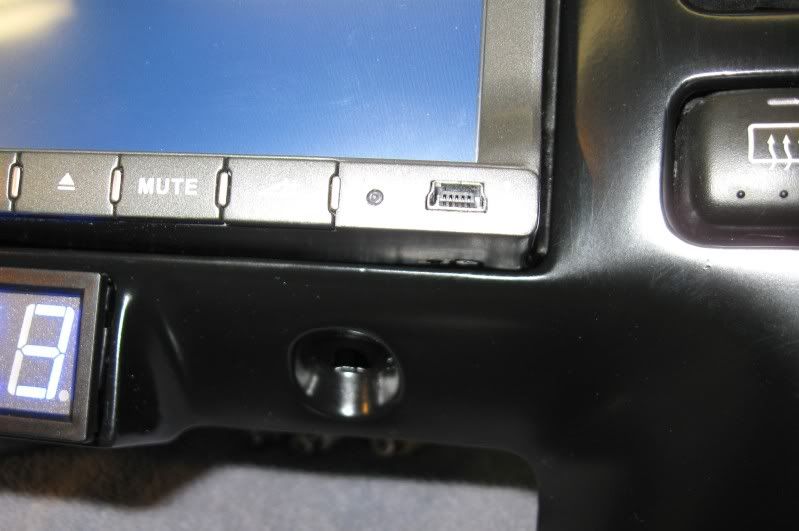
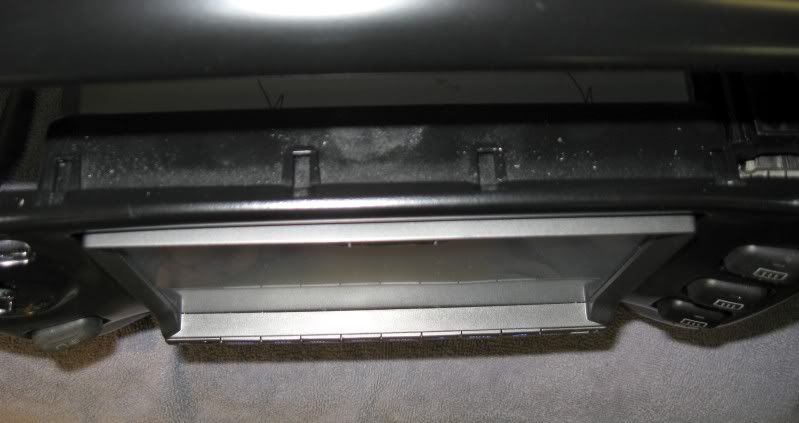
    I didn't want those plastic inserts on the sides of double din's that fill in the gap, nor did I want this double din DVD to stick out so far from the dash (about 1/2" to 5/8" yuk).
    Also the bottom of the screen sticks below the bottom of the rest of the chassis by about 3/16" that made mounting flush in the original opening impossible. To remedy this, I enlarged the bottom opening and filled in the gaps behind the old opening as well as the large opening created by enlarging the opening.
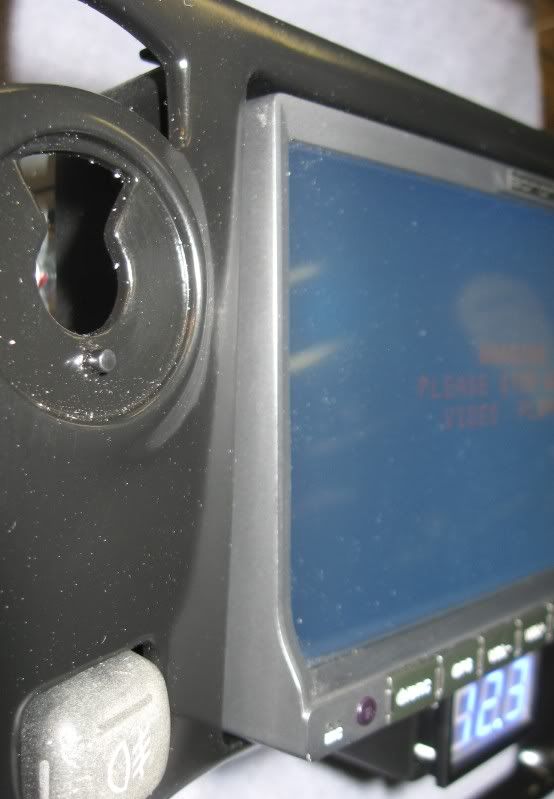
    Everything has to be blended in to match the contours of the bezel as well as creating an opening with the proper amount of reveal & spacing for the screen to be able to tilt down when inserting CD's, DVD's or memory cards.

    So I started taking measurements & marking things out.
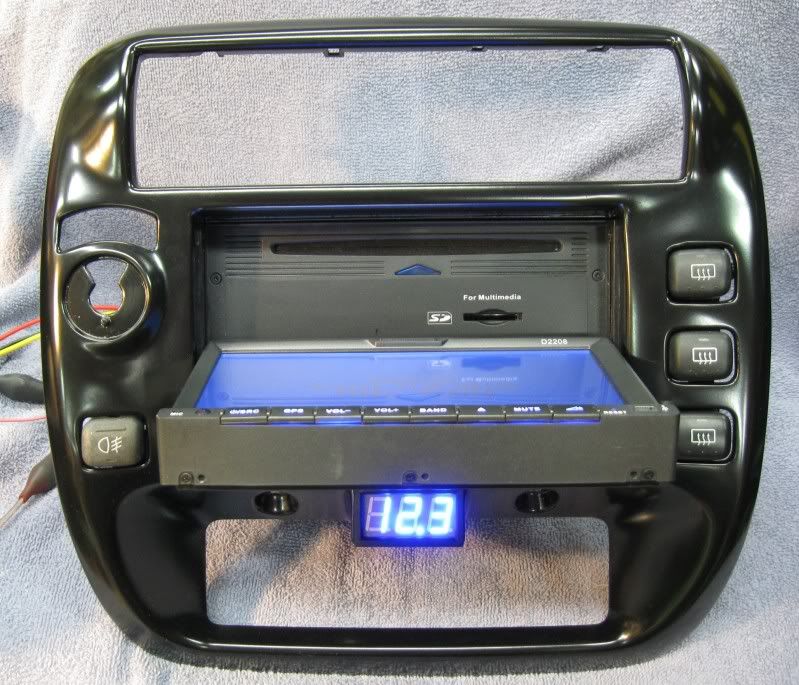
    My idea is to fill in the areas on the sides where the inserts normally go so the bezel fits the head unit, not a bunch of plastic making up the gaps. As of now, it's coming along, I have the basic opening made & I've designed my own side mounting brackets that will receive an upgrade before I'm finished.

    I'll probably do a couple sets of my double din brackets, so look out for a new buggman mod coming soon to a Ranger near you.

    This is by far going to be the most custom bezel I've done so far... and I'm not close to being done modding it yet. :D

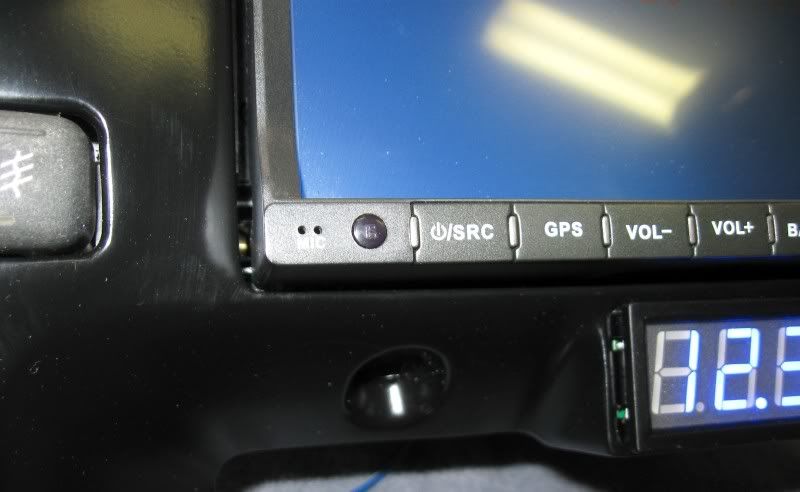
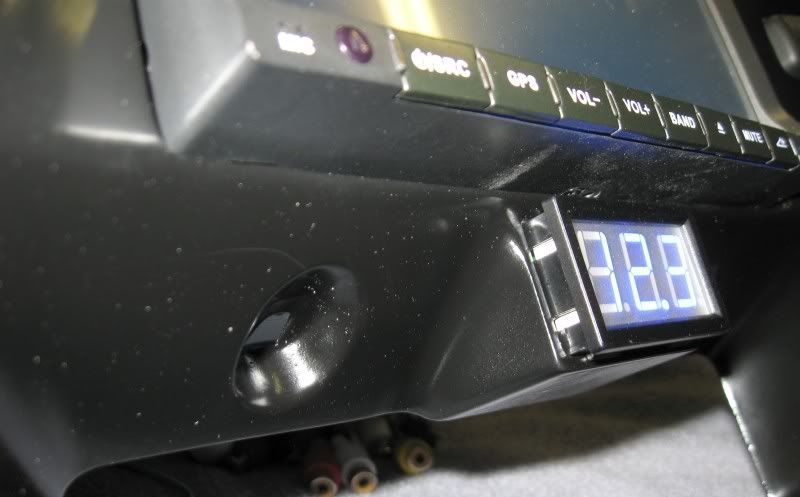
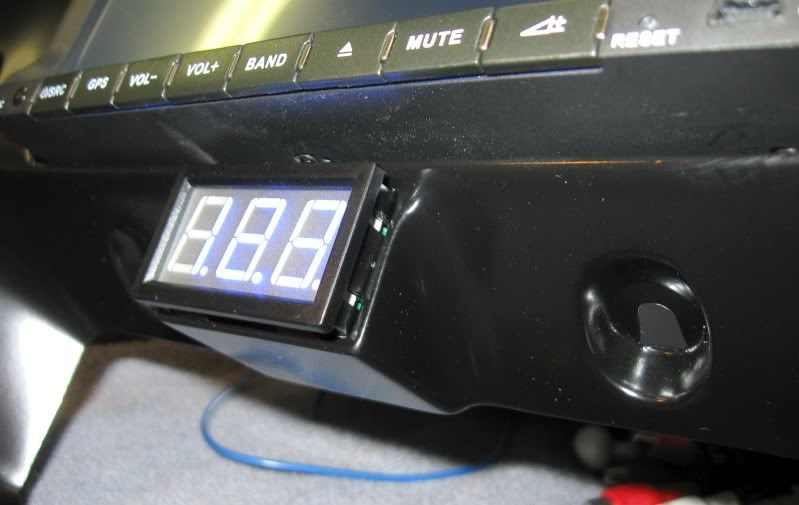
    Since the double din is gonna take up the space where my voltmeter currently resides, I need to come up with a solution for that... as well as where to install the 2 mini switches needed to control the reverse camera & DVD bypass functions. Then there's always the issue of the future Expo roof racks mounted lights, led's & camera.

    Pics to come as it progresses...
     
  2. Ranger Forum Sign Up!

    Join RangerForum.com Today - It's Totally Free!

    Are you a Ford Ranger fan? If so we invite you to join our community and see what it has to offer. Our site is specifically designed for you and it's a great place for Ford Ranger Fans to meet online.
    Once you join you'll be able to post messages, upload pictures of your Ford, and have a great time with other Ranger fans. Whether your an old timer or just bought your Ford you'll find that Ranger Forum is a great community to join. Best of all it's totally free!

    Join RnagerForum.com Today! JOIN FOR FREE

  3. timbits588

    timbits588 New Member

    i'm definitely going to be following this one!
     
  4. Pbav8tor

    Pbav8tor Old Fart

    Me too.
     
  5. El Camino Man

    El Camino Man Thank The Lord For BBFs!

    pics pics pics!
     
  6. 08 Ranger Sport 4X4

    08 Ranger Sport 4X4 New Member

    Pics or GTFO! Can't wait to see it Terry.
     
  7. X3!!!
     
  8. Hooligan

    Hooligan Rangerholic!!

    Put me down for one please!
     
  9. OP
    buggman

    buggman Do not touch the trim!

    Got a little more done today/tonight but had to quit about 2am due to bad weather & being worn out.

    This is officially the laziest update in the history of my posts too. With so much lightning I didn't want to turn on the pc, so I'm posting this from a blackberry while laying in bed trying to get my back straightened out.

    The 3x fog openings on the right side are almost done & the New location for the voltmeter is in place. I've been modding the left side all day for a 4th fog switch where the old cig outlet was. Hope to get some pics posted this weekend too.

    About the last mods needed will be finding a location for the video/reverse switches. Need to take it out to the truck to do some test fitting too.
     
  10. OP
    buggman

    buggman Do not touch the trim!

    Finally got a pic after the first of many coats of paint...

    [​IMG]

    It's not perfect, but it will do for my old truck :thumbsup:

    Still need to make the new side mounting brackets so I can actually mount the dvd & need to get the voltmeter installed once all the paint is done. I'm not sure where I want to put the dvd switches yet.
     
  11. OP
    buggman

    buggman Do not touch the trim!

    New update with slightly less crappy pics.
    Still have a bit of modding to finish... the 4x4 insert needs to be installed & the voltmeter needs to be wired up & fully pressed in... vents need to go back in... need to transfer my 3 old switches & mod a new one... find a location for the mini switches & find time to get it installed...

    On to the pics!

    [​IMG]

    [​IMG]

    [​IMG]

    [​IMG]

    [​IMG]

    [​IMG]

    [​IMG]

    [​IMG]

    [​IMG]

    [​IMG]

    [​IMG]

    I'm really happy with how the gap around the dvd screen came out. That was one of the hardest parts to get modded... had to cut out the bottom section and re-contour the remaining plastic of the bezel to blend in. It kinda makes the screen appear larger than it actually is :thumbsup:

    And Yes, I know there are defrost switches in the fog holes... those are my "test" switches so I don't get any nice clean ones messed up while I'm fitting things together :)

    It needs to be cleaned off better to remove the smudges from handling it & the dust & gunk that has already found it's way on there.
    I can't wait to get it installed to see how it sounds & looks... that reminds me that I need to get some cameras so I can see behind & all around too.
     
  12. doyouquaxu

    doyouquaxu FUUUUUUUUUUUUU

    me gusta the voltmeter hole. what'd you do, use abs plastic and epoxy to make that?
     
  13. OP
    buggman

    buggman Do not touch the trim!

    kinda... I used some of my textured abs panels turned inside out, cut reliefs in the corners, heated them up & bent them at 90*, then cut to fit the angle of the bezel. It was quite an adventure heating & bending the plastic while trying to keep a 90* angle and not burn the crap outta my fingers.

    A combination of bondo & quick steel epoxy along with some gorilla super glue (first time super glue of any kind has ever stuck to anything but my fingers)
    Made the contours on the sides by sanding with various size dowels to get just the right feel.

    I must have used half a can of bondo on everything for this one.
     
  14. doyouquaxu

    doyouquaxu FUUUUUUUUUUUUU

    it looks amazing. i wish my work was half as good as yours.
     
  15. looking good
     
  16. Scrambler82

    Scrambler82 Old Guy User

    Haven't attempted mine yet, maybe the pieces I have aren't even this mod but I think it is.

    Hoping for this afternoon but gotta get the Shed cleaned out first.

    Looks good.
     
    Last edited: May 8, 2012
  17. 08 Ranger Sport 4X4

    08 Ranger Sport 4X4 New Member

    Really nice work here Terry! Looks great!
     
  18. OP
    buggman

    buggman Do not touch the trim!

    You have a set of the side mount rails I did as a prototype. They're the same size as the "name brand" mounting kits, but you get to position them & drill your own holes for a full custom fit.
    You may still need the filler pieces for the side gaps, but in case you didn't have any, I painted the ends of the side rails so they won't show as much.

    I made a new version for mine that are about 1/2" taller, but they work the same way. Got mine drilled out & mounted last night too. They have absolutely no play & really secure the head unit in place.

    Hope your bezel looks the way you want it when it's painted :thumbsup:
     
  19. timbits588

    timbits588 New Member

    wow that looks amazing
     
  20. OP
    buggman

    buggman Do not touch the trim!

    Finally got everything fitted & installed today. Had to modify the dash a bit to get proper clearance for some of the new additions, but it eventually went in.
    Also had to engineer a new power supply for the new voltmeter to make the install a little easier than the old hard wired method.

    I only had a little time to test it out but so far so good. For some reason it doesn't like my 8gb microSD cards using a SD card adapter, but I have a 16gb sdhc card on the way. It recognizes a 2gb microSD card but not much music on there to really put it to the test.
    The mini usb port on the front works with a usb adapter too. I just had a 4gb usb thumb drive with a few songs on it, but it worked pretty well.
    Not sure if it's due to the long folder/artist names but sometimes the folder/track display shows Metallic~1.... or something like that. Probably something I don't have set up correctly.

    It's easy to see from the drivers seat & I played a few minutes of a dvd & the sound was amazing even though I still haven't figured out all the options yet. Can't wait to watch & listen to something like Cast Away.

    The reverse camera part works, although I don't have a reverse camera yet. Still need to figure out the mounting & run the wires for that once I get a real reverse cam. Right now I have the reverse cam control wire connected to a mini button switch so I can turn it on whenever I want, but I may add another on/on switch in the console to allow it to be controlled either by the switch or by the reverse lights. I really don't like the idea of the cam coming on (along with the head unit & amps) every time I pull the truck into gear so I might leave the switch control as is.
    The TV/AUX video in 2 works with the bypass switch too.

    In the little test I did with the truck running & the head unit muted, I heard absolutely no noise or alternator whine which has been a common issue in my truck for years.

    Once I recuperate from a day in the hot sun in the truck, I'll clean everything up a little better & get some new pics & maybe even some videos. :)
     

Share This Page