01B3000
ORIGINAL Portable Seizure
Ok, this is extremely easy, maybe a 3 on a level from 1-10. Took about 45 minutes.
PERFORM AT OWN RISK.
Things needed:
A drop light
10MM Socket
Socket Extensions
5.5MM Socket (I think)
Clean Motor oil
New Syncro
Syncro Alignment tool
NOTE: All photos will be shown so that the bottom of the photo points to the front of the engine.
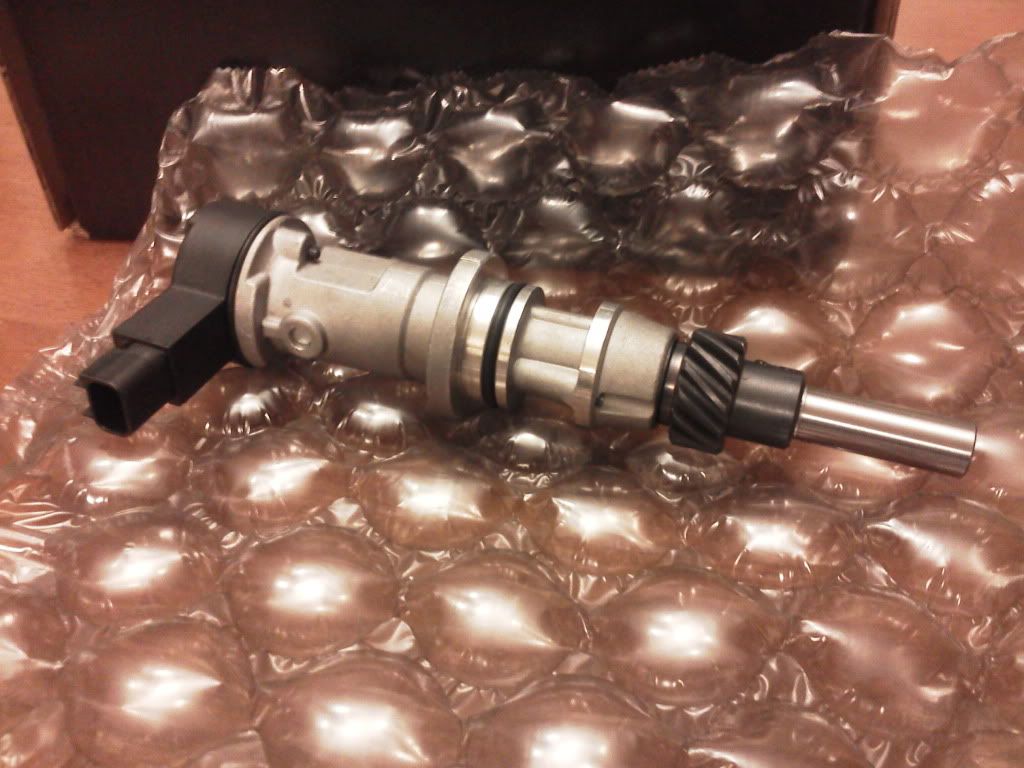
Anyways to start, you need to get the new part first.
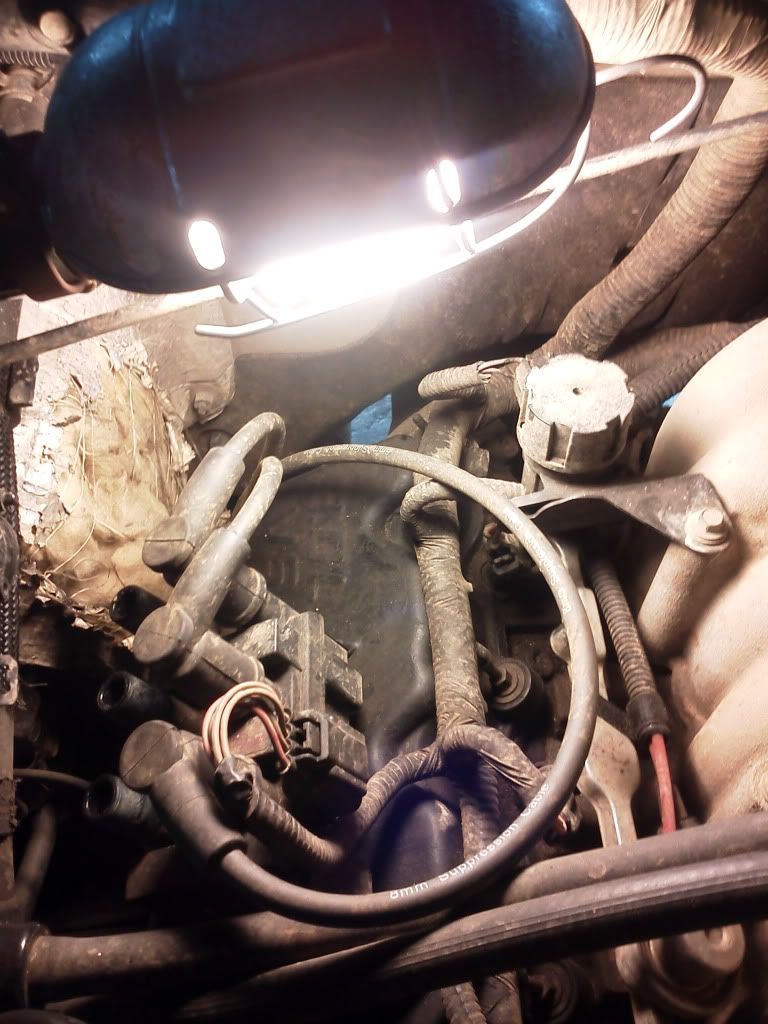
Now, the Synchro is on the passenger side rear of the engine, all the way in the back. To make it easier, remove the spark plug wires from the coil pack going to the drivers side of the engine, label them for quick easy installation when your done.
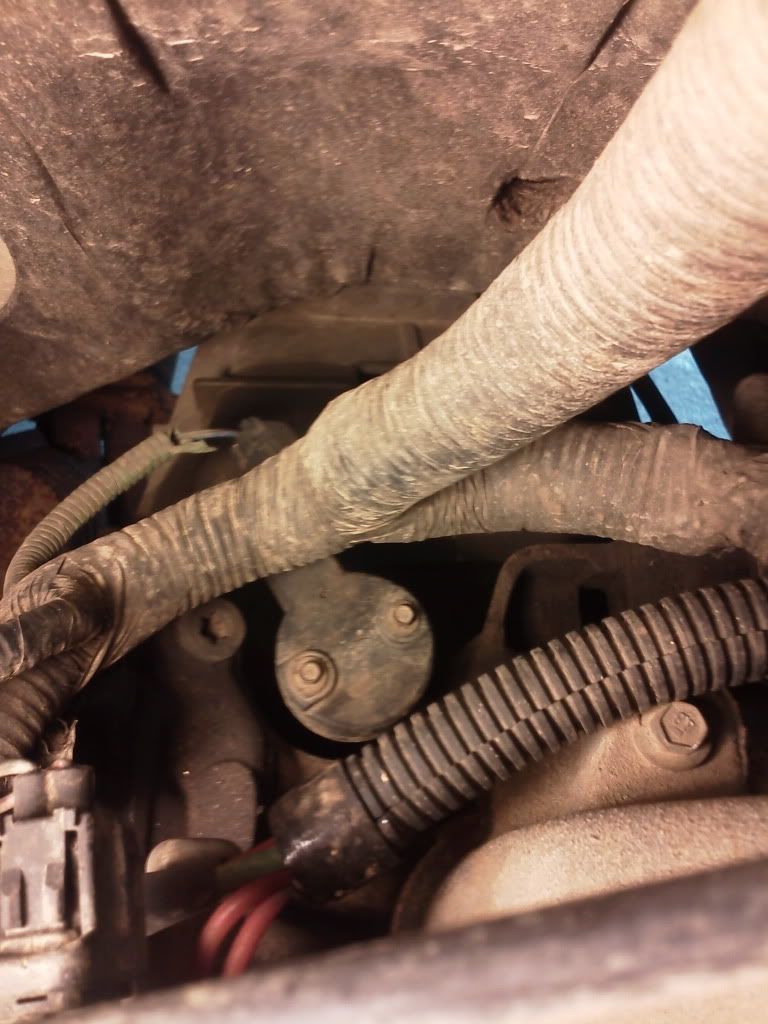
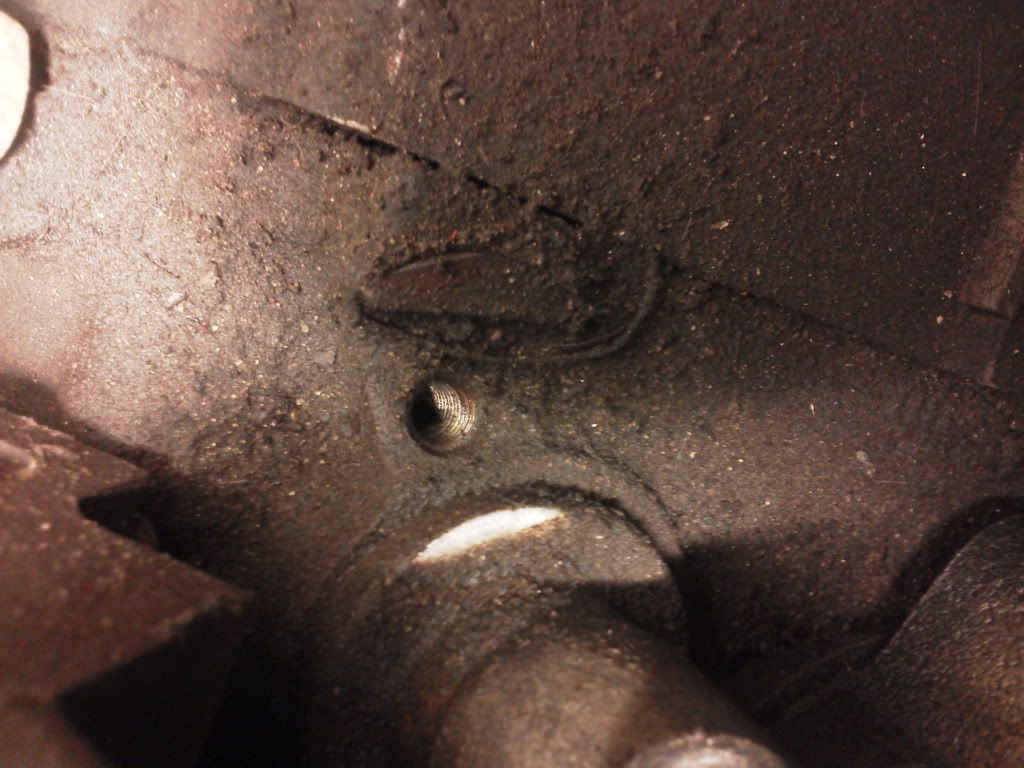
This is what the top of it looks like, thats the sensor on top, I believe they are 5.5MM, I dont remember which one I grabbed. Remove both bolts then remove the sensor.
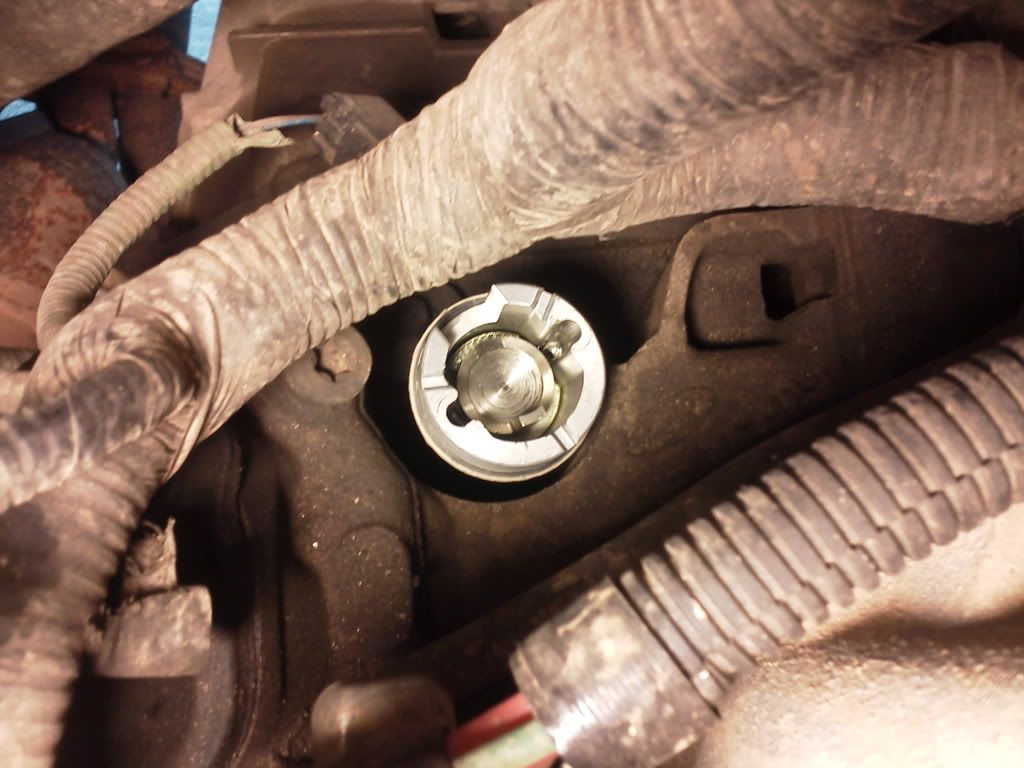
With the sensor removed, you can see the cutout in the window for the sensor to be seated. Keep note of where this is. Also notice the Slightly curved pin sticking up from the shaft, that is what lets the sensor know what cylinder is where. Also keep note of where this pin is. IT IS EXTREMELY IMPORTANT THAT EVERYTHING IS PUT IN THE SAME LOCATION, OTHERWISE THE TIMING WILL BE INCORRECT AND YOUR ENGINE WILL NOT RUN CORRECTLY.
Now put your alignment tool onto the top of the syncro, it will slide in with the pin, and the arrow on top will allow you to easily align the new syncro with the old. I found a picture was the best way to keep an Idea where the old syncro was
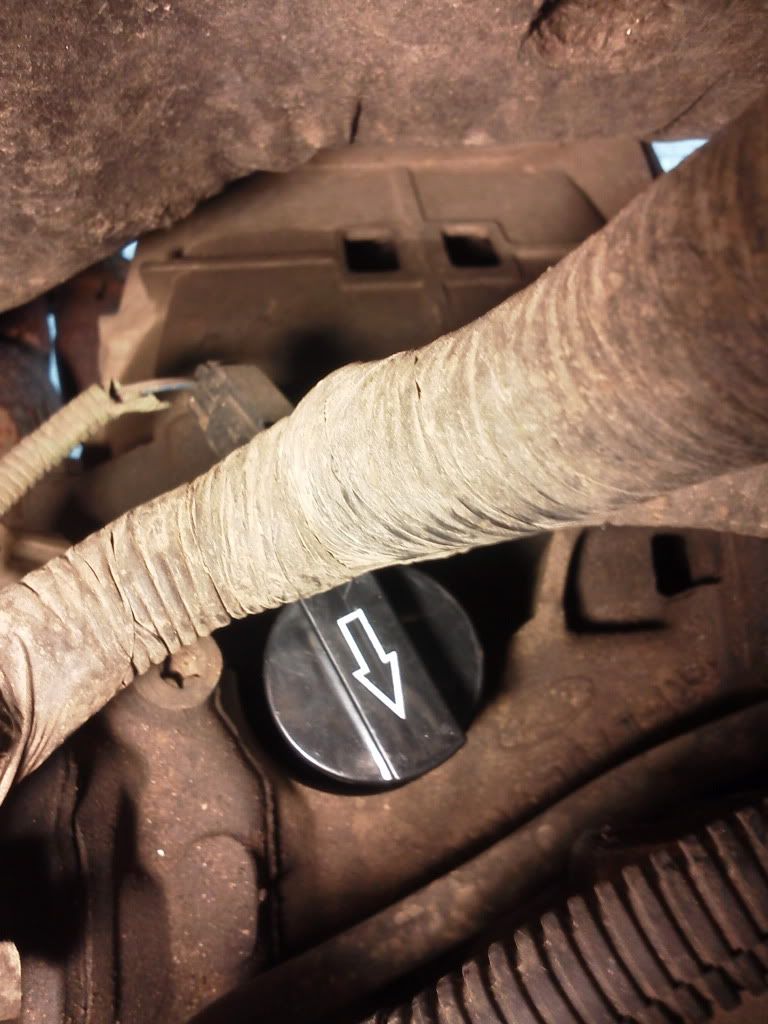
Now, Remove the 10MM bolt that holds the camshaft syncro in place on the engine.
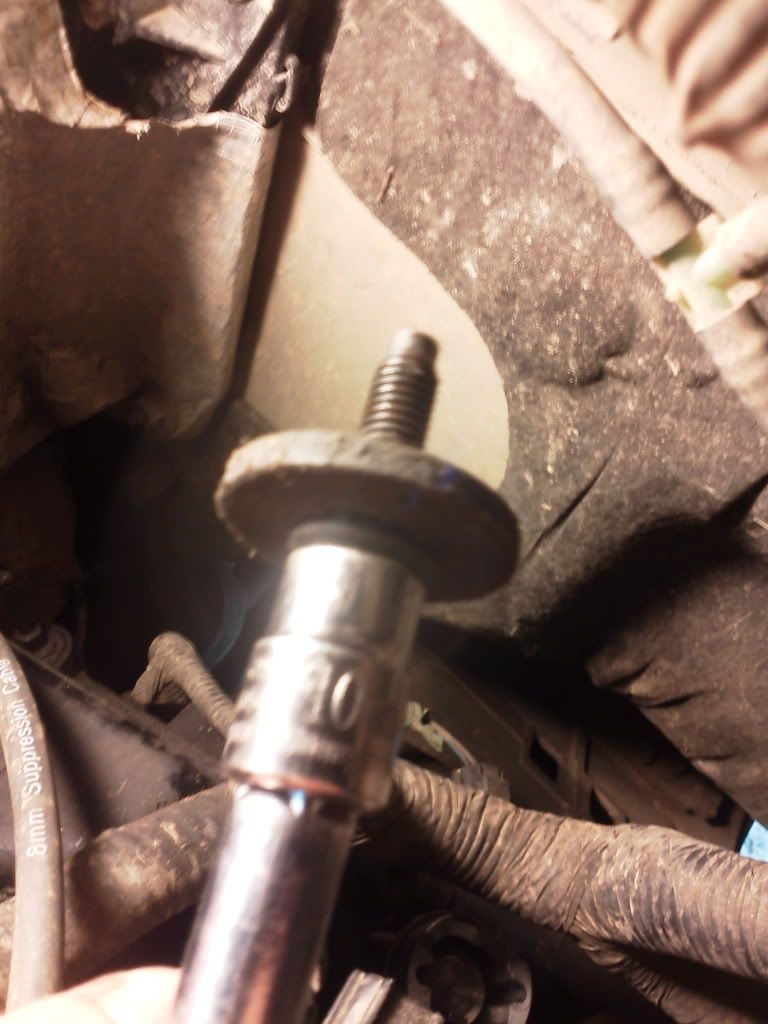
(Dirty Engine, I know)
Now, it may be a little difficult to remove the syncro, Just twist the top portion (what holds the sensor to the syncro) and it should pop right out.
Installation is the reverse of the above, EXCEPT, do not tighten the bolt until the sensor is properly aligned and in the same orientation as the original!
It may take one or two tries to get the sensor in there right, but it will go how it used to.
After I finished mine, reconnected everything and she started right up. I noticed that the truck Idles much smoother and also has a little bit more pick up.
I will edit this and add a few arrows to the pictures soon.
PERFORM AT OWN RISK.
Things needed:
A drop light
10MM Socket
Socket Extensions
5.5MM Socket (I think)
Clean Motor oil
New Syncro
Syncro Alignment tool
NOTE: All photos will be shown so that the bottom of the photo points to the front of the engine.
Anyways to start, you need to get the new part first.
Now, the Synchro is on the passenger side rear of the engine, all the way in the back. To make it easier, remove the spark plug wires from the coil pack going to the drivers side of the engine, label them for quick easy installation when your done.
This is what the top of it looks like, thats the sensor on top, I believe they are 5.5MM, I dont remember which one I grabbed. Remove both bolts then remove the sensor.
With the sensor removed, you can see the cutout in the window for the sensor to be seated. Keep note of where this is. Also notice the Slightly curved pin sticking up from the shaft, that is what lets the sensor know what cylinder is where. Also keep note of where this pin is. IT IS EXTREMELY IMPORTANT THAT EVERYTHING IS PUT IN THE SAME LOCATION, OTHERWISE THE TIMING WILL BE INCORRECT AND YOUR ENGINE WILL NOT RUN CORRECTLY.
Now put your alignment tool onto the top of the syncro, it will slide in with the pin, and the arrow on top will allow you to easily align the new syncro with the old. I found a picture was the best way to keep an Idea where the old syncro was
Now, Remove the 10MM bolt that holds the camshaft syncro in place on the engine.
(Dirty Engine, I know)
Now, it may be a little difficult to remove the syncro, Just twist the top portion (what holds the sensor to the syncro) and it should pop right out.
Installation is the reverse of the above, EXCEPT, do not tighten the bolt until the sensor is properly aligned and in the same orientation as the original!
It may take one or two tries to get the sensor in there right, but it will go how it used to.
After I finished mine, reconnected everything and she started right up. I noticed that the truck Idles much smoother and also has a little bit more pick up.
I will edit this and add a few arrows to the pictures soon.